How to add a comment with the "Photos" application - Tutorials Ordissimo (Ordissimo v4)

Together we'll go step by step through how to insert a comment on any image saved to your Ordissimo using the "Photos" application.
1Click on the "Photos" application.
From your home screen, click on the "Photos" icon on the applications bar.

2Click on the album of choice.
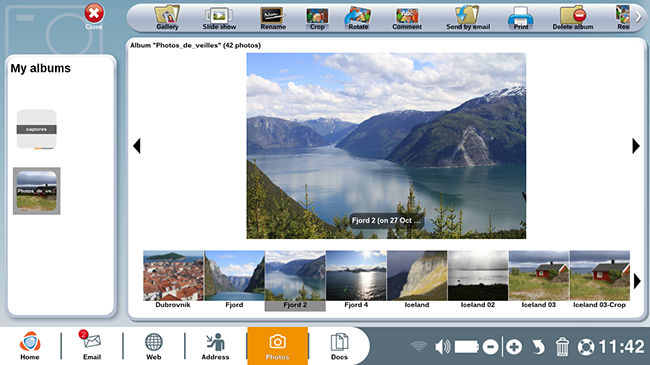
Once in the "Photos" application, click on the album of interest in the left hand column. After choosing the album, click on a photo.

3Add a comment.
a. Click on the "Comment" icon.
Now you'd like to write a comment on the photo. Simply click on the "Comment" icon on the toolbar.

b. Write your text.
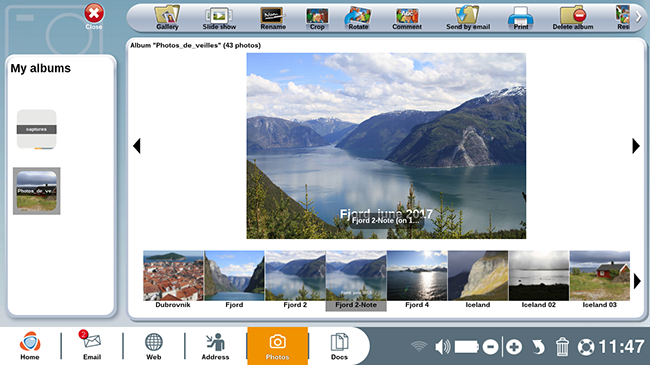
Next, write a comment directly on the photo corresponding to the name of the place where the photo was taken. You also have the option of writing a brief description.

c. Click on "Ok".
Once you've finished your comment, click on "Ok" on the toolbar.

d. Your comment is saved.
Here we see the photo with the newly saved comment.

The original photo is saved to the left of this annotated photo. You may access it by clicking on "Previous photo".
4Select another photo.
Now, click on a second photo in order to see it full sized.

5 ZOOM : you wish to write a title with a larger font size.
a. Click on the "Comment" icon.

b. Once you've written your text, click on "-" or "+" to decrease or increase the size of the comment. You also can use the "Zoom-" and "Zoom+" keys on your keyboard.

c. As soon as you click on "Ok", your comment will be saved in the selected size.

6Find your photos in "Documents".
a. Click on "Documents".
You can easily locate these photos in "Documents". Click on the "Docs" icon to the bottom of your screen.

b. Click on the "Images" directory.
By clicking on the "Images" images directory followed by the photo album in question (in this example: "Screensaver"), you will have access to original photos and those with added comments (the word "-Note" appears in the image title).

With the "Photos" application, you can send your annotated photos to loved ones via email. To do so, use the practical guide Send a photo via email with the "Photos" application.

 send to a friend